Testing our Skill - Alexa Skills w/ Python and Flask-Ask Part 3
Welcome to part 3 of the Alexa Skills tutorial for Python programmers. What we're going to be doing here is actually deploying the skill and testing it on our Alexa-enabled device.
Our code up to this point:
from flask import Flask
from flask_ask import Ask, statement, question, session
import json
import requests
import time
import unidecode

app = Flask(__name__)
ask = Ask(app, "/reddit_reader")

def get_headlines():
    user_pass_dict = {'user': '',
                      'passwd': '',
                      'api_type': 'json'}
    sess = requests.Session()
    sess.headers.update({'User-Agent': 'I am testing Alexa: Sentdex'})
    sess.post('https://www.reddit.com/api/login', data = user_pass_dict)
    time.sleep(1)
    url = 'https://reddit.com/r/worldnews/.json?limit=10'
    html = sess.get(url)
    data = json.loads(html.content.decode('utf-8'))
    titles = [unidecode.unidecode(listing['data']['title']) for listing in data['data']['children']]
    titles = '... '.join([i for i in titles])
    return titles

@app.route('/')
def homepage():
    return "hi there, how ya doin?"

@ask.launch
def start_skill():
    welcome_message = 'Hello there, would you like the news?'
    return question(welcome_message)

@ask.intent("YesIntent")
def share_headlines():
    headlines = get_headlines()
    headline_msg = 'The current world news headlines are {}'.format(headlines)
    return statement(headline_msg)

@ask.intent("NoIntent")
def no_intent():
    bye_text = 'I am not sure why you asked me to run then, but okay... bye'
    return statement(bye_text)

if __name__ == '__main__':
    app.run(debug=True)
Remember to fill in Reddit username and password information in the get_headlines function!
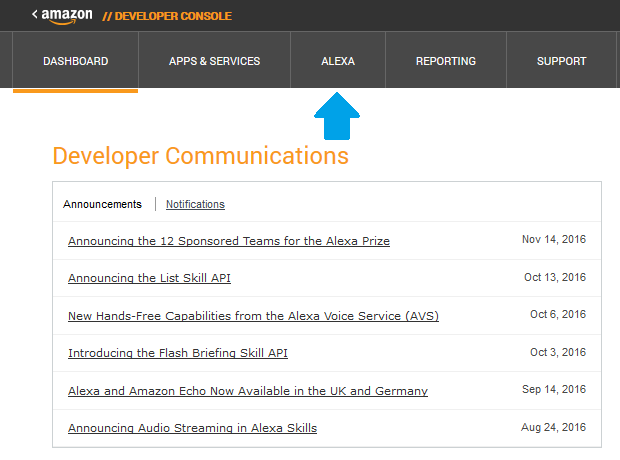
Now, we've got to set this app up on the Alexa Skills section of Amazon. This won't publish your skill unless you want it to, but you can test it out! Head to developer.amazon.com, sign in, and click on the Alexa tab:

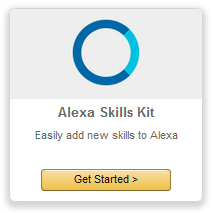
Choose the Alexa Skills Kit:

Next, click on the "add a new skill" button:

Now, choose a name, and an invocation name. The name is what shows in the app, and the invocation name is the name your Alexa device will start the skill with. I am just going to use "Reddit News" for both of these. Leaving the rest as default, click "next."
Here, we have an "intent schema" and "sample utterances." The intent schema is just basically an outline of possible intents in json format, and then the sample utterances are the words that would trigger those intents, and here you just have one line each. From here, the intents would be called, and then our code is used.
Let's show an example of the intent schema first:
{
    "intents": [{
        "intent": "YesIntent"
    },

    {
        "intent": "NoIntent"
    }]
}
As you can see, we've got just "intents", and a list of intents and their values. This schema can get much more complex, but our's is obviously quite simple. Now for the sample utterances:
YesIntent yes
YesIntent sure

NoIntent no
NoIntent go away
With these utterances, basically, we're saying that "yes" or "sure" from our user will trigger a YesIntent and then a "no" or "go away" will trigger a NoIntent.
That's all here, click next, and a model will be built, so this part can take a moment.
Now, we have to choose the configuration. We can either point this app to an AWS Lambda setup, or an HTTPS location. If you have an HTTPS enabled server with flask-ask installed, you can just point it to that server. Otherwise, for local development purposes, you can just use ngrok. We'll use ngrok, since I think most people wont have an https enabled server laying around. Go ahead and start your python file, you should see:
 * Running on http://127.0.0.1:5000/ (Press CTRL+C to quit)
 * Restarting with stat
Great, so the Skill is running on your localhost, but Amazon has no way to access this right now, so you can use ngrok. Download Ngrok, then extract ngrok to the directory you're working in, or open a terminal and change directories to the one that ngrok is in. Now, in the terminal/command prompt, type ngrok http 5000. This will run ngrok over http on port 5000 for you, which is where our app is currently running. Running that command, you should see something like:

This will now forward requests those ngrok links to your localhost. Thus, for me, I can use https://a1e12c29.ngrok.io as my HTTPS address for the Alexa Skill!
Choose the HTTPS option, pick North America or Europe, then fill in the HTTPS version of the ngrok link. For me, that'd be https://a1e12c29.ngrok.io/reddit_reader. Wherever you assigned the skill itself should be in the path. Since I did: ask = Ask(app, "/reddit_reader") in the python file, that means it's at my website.com/reddit_reader for example. Again, if you have your own HTTPS server, and you've put this app on there, then fill that in instead and you wont need ngrok. Okay, click next. Now, if you have your own server with its own SSL cert, you can stick with the first option. If you are using ngrok, then use the 2nd option My development endpoint is a sub-domain of a domain that has a wildcard certificate from a certificate authority. Hit next, and you're ready to test the skill on your account. Remember, this account (the account you're using in the developer console) needs to be the same account that you paired your Alexa device with.
Now, you can ask your Alexa device: "Alexa, start Reddit News." You will be asked if you want to hear the news, to which you can either respond "yes" or "no." If you say "yes" you will get the headlines and then the skill will end. If you respond "no," then the skill will end.
As you develop, here are some common issues:
If you get an immediate: "There was a problem with the requested skill's response", this means your server that is hosting your code is unreach-able. Check your ngrok connection, make sure it's there. If you've reloaded ngrok, then you've got a new address, change it in the Alexa Skill on the developer.amazon website.
If at some point in your app, when starting or maybe during the app at some point, you issue a command and get "there was a problem with the requested skill's response," this tends to mean you have an error in your code. Try to run the functions that would have been executed based on your commands, and make sure they really work.
That's all for now. For more Python tutorials, head:
